Frequently Asked Questions
- Parts of my mesh are missing or appear transparent. How can I fix this?
- I want to include images as 3D objects in my Voyager scene. How can I accomplish this?
- Some of the materials of my 3D models appear white on Voyager. How can I remedy this?
- Some parts of my mesh seem to have weird shadows or other peculiar visual artifacts. How can I resolve this issue?
- I want to delete one (or more) of the models from my edition. What is the best way to do this?
- Controlling the viewport camera in my edition in Voyager is very tedious and it is exceedingly hard for me to center it on a view of my choice. How can I make the camera navigation easier for me and the viewers?
- Some (or all) of the models in my Voyager edition take a long time to load. How can I speed this up?
- The (relative) location, rotation, and scale of one or more of my 3D model(s) is different than expected. How can I resolve this issue?
Parts of my mesh are missing or appear transparent. How can I fix this?
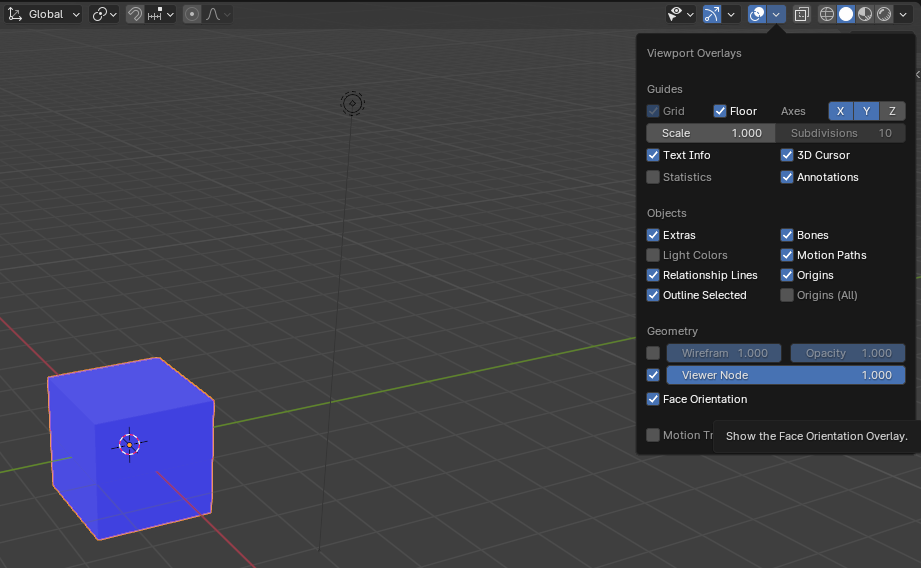
This issue usually occurs when some normals of a mesh are facing the wrong way (back-facing normals), or if a part of a mesh is single-sided. To identify the problematic normals in Blender, enable Face Orientation Overlay (Figure 1). The normals in blue color are facing in the right direction whereas the ones in red are back-facing.
The orientation of any back-facing normals may be fixed in one of two ways:
1. Automatically recalculate the orientation of the selected faces. Then, while in Edit Mode, select Mesh>Normals>Recalculate Outside/Inside
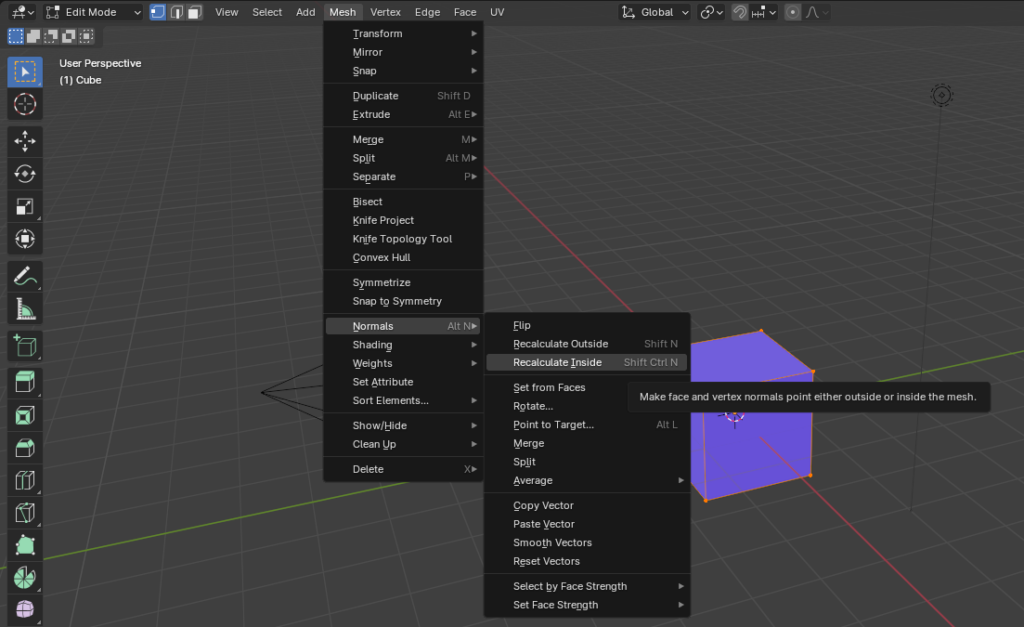
2. Manually select only the problematic faces in red. Then, while in Edit Mode, select Mesh>Noramls>Flip, to turn the selected faces around. Note that this will also flip any right-facing normals and make them back-facing if they are selected.

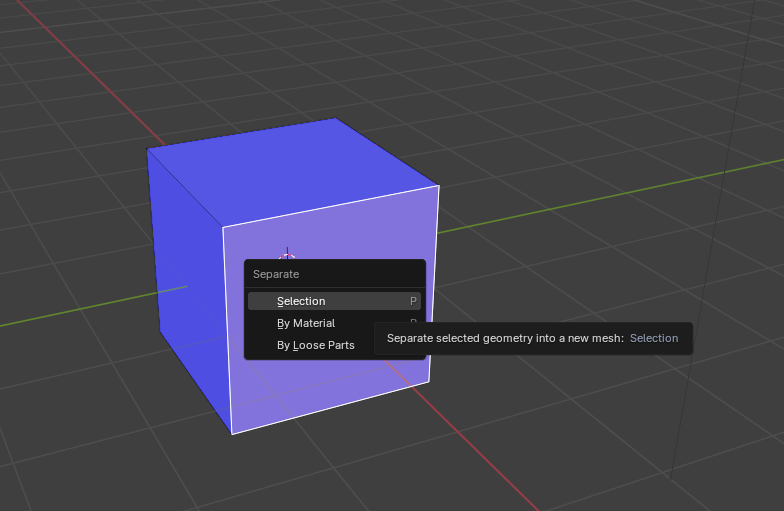
If a mesh is single sided, add thickness to it in the following steps:
- Select all the single-sided parts
- Make them separate objects by pressing Ctrl+P then Separate by selection.
3. Add a solidify modifier on the selected single-sided object(s). At the modifiers tab of the object(s), select Add Modifier>Generate>Solidify.

I want to include images as 3D objects in my Voyager scene. How can I accomplish this?
The simplest way to insert images as 3D objects is by projecting them onto 3D planes.
To import an image as a 3D pane in Blender:
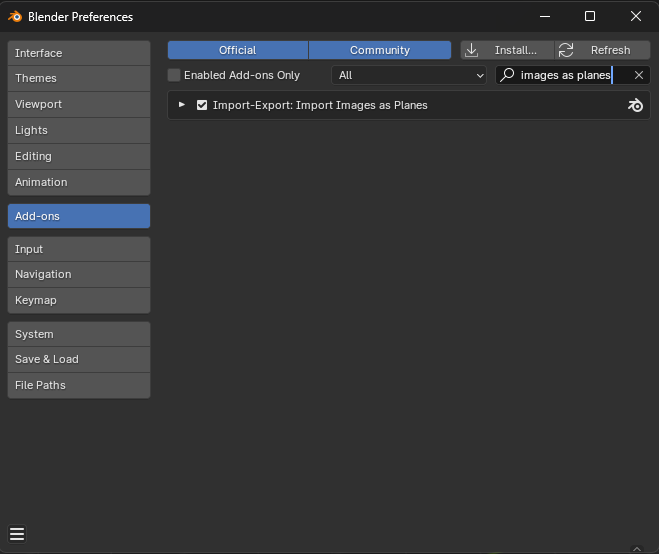
Activate the built-in add-on Import-Export: Import Images as Planes by selecting Edit>Preferences.
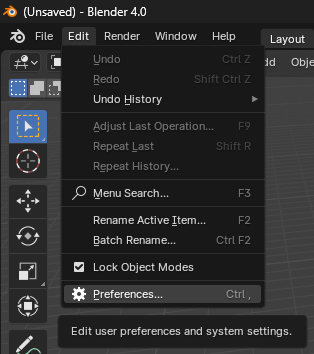
Next, select Add-ons from the left-side menu, search for Images as Planes, and activate it by checking the box.
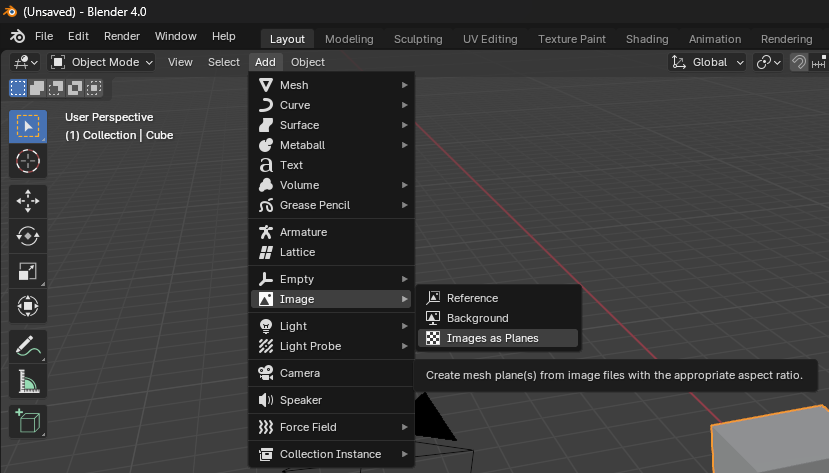
To import the image as a plane, while in Object Mode, select Add>Image>Images as Plane.
Export the 3D plane as a separate GLB file.
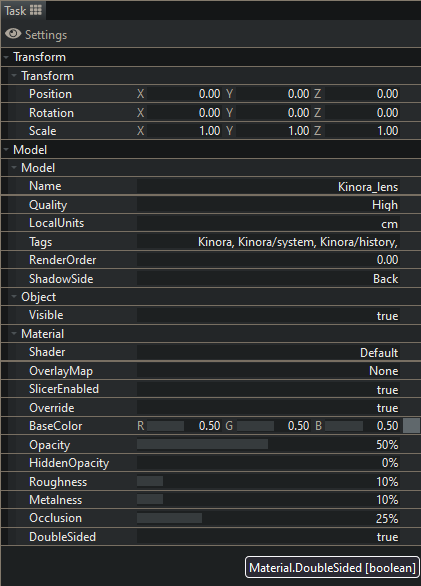
Upon importing to Voyager, make sure the 3D plane is set to double-sided: Under the Settings of the model, set Material Override to True and DoubleSided to True.
Some of the materials of my 3D models appear white on Voyager. How can I remedy this?
The cause for this issue may vary:
- The Voyager (viewer or editor) is set to an older version which does not support multiple UV Maps. Make sure you are using the latest Voyager version available when viewing or editing an edition. The latest version will be at the top of the list of available versions.
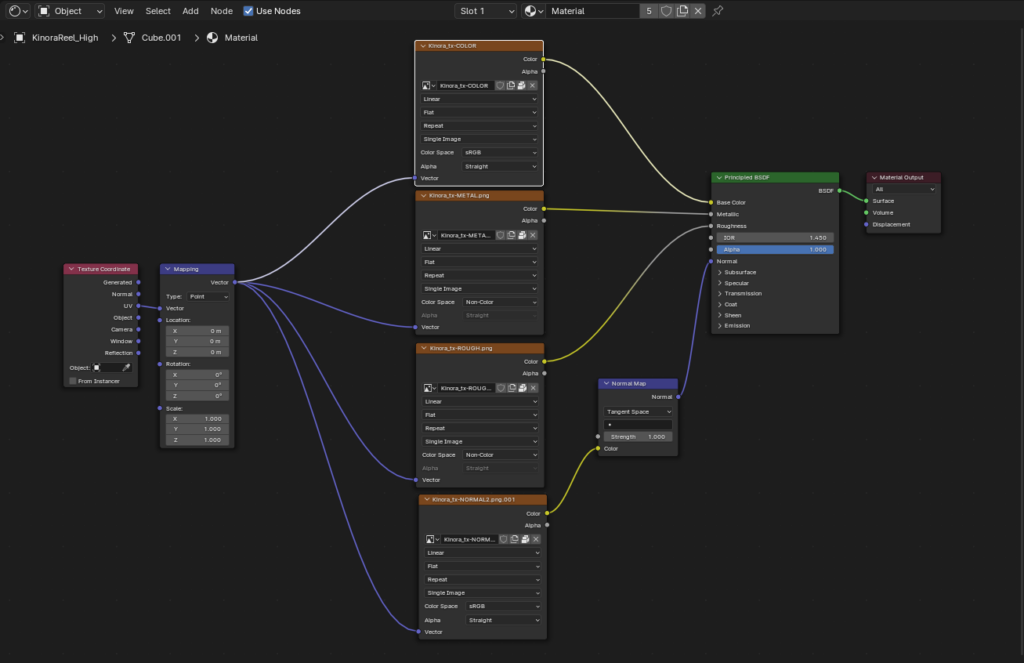
- The materials are made procedurally in Blender or other 3D software, which does not transfer over to other platforms or applications. Make sure your textures are “baked” before exporting the models. The shader input during export to GLB should have the texture maps connected as flat image textures. This supports color, metallic, roughness, and normal map textures.
Some parts of my mesh seem to have some weird shadows or other peculiar visual artifacts. How can I resolve this issue?
This is usually caused by one of the following reasons:
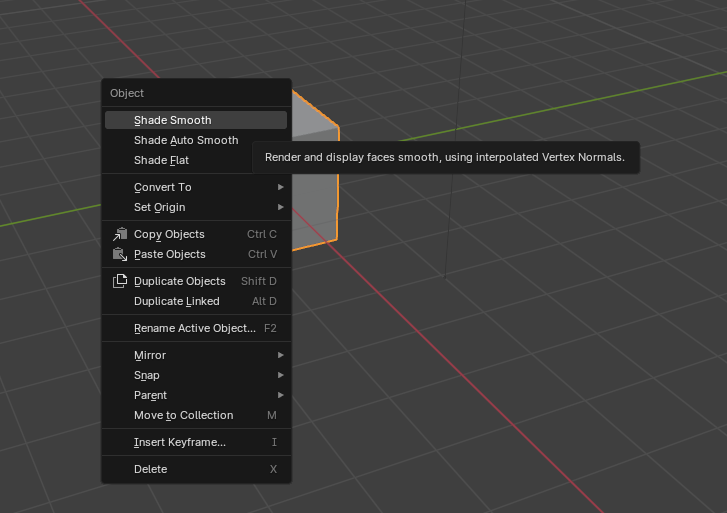
- The mesh shading is set on Smooth. In Blender, the shading of the mesh can be changed at any time, while in Object Mode, Right-click on the mesh and select Shade Smooth/Flat.
 While smooth-shading is active, the minimum angle that automatically limits the smooth shading can be controlled by ticking Auto Smooth in the 3D Object’s Data menu, under Normals.
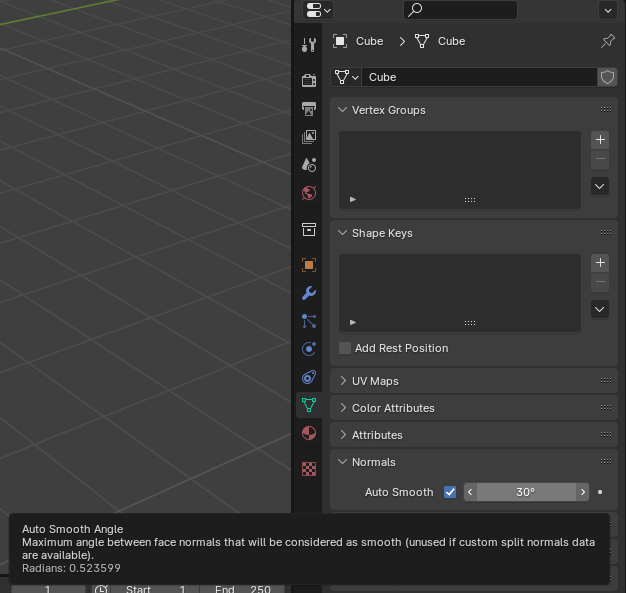
- The mesh contains “n-gons“. The faces of 3D models should have either 3 or 4 sides. Normals that are above that limit are referred to as n-gons. To select and fix all n-gons in Blender, while on Edit Mode, access Select>Select All by trait>Faces by Sides.
 In the context menu that appears on the bottom left side of the viewport, set the values to Greater Than, with Number of Vertices= 4. This will select all the n-gons for you to manually correct.
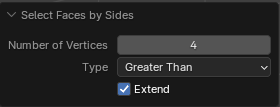
- The mesh has problematic topology. This may be due to boolean operations or incorrect modeling. Try re-modeling the problematic areas after deleting the affected faces.
I want to delete one (or more) of the models from my edition. What is the best way to do this?
There is no possibility to remove or delete models from a Voyager edition at this time.
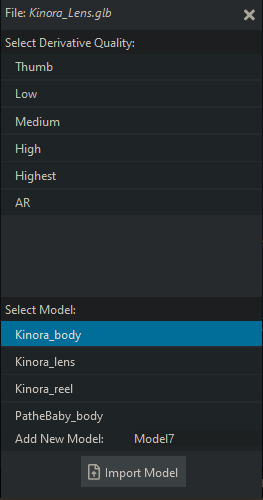
If you simply need to update the model to a newer instance, overwrite the previous one by importing it in the scene and selecting the same Derivative Quality and the correct model name from the Select Model list.
Some (or all) of the models in my Voyager edition take a long time to load. How can I speed this up?
This is usually caused by the existence of excessive geometry inside a 3D scene.
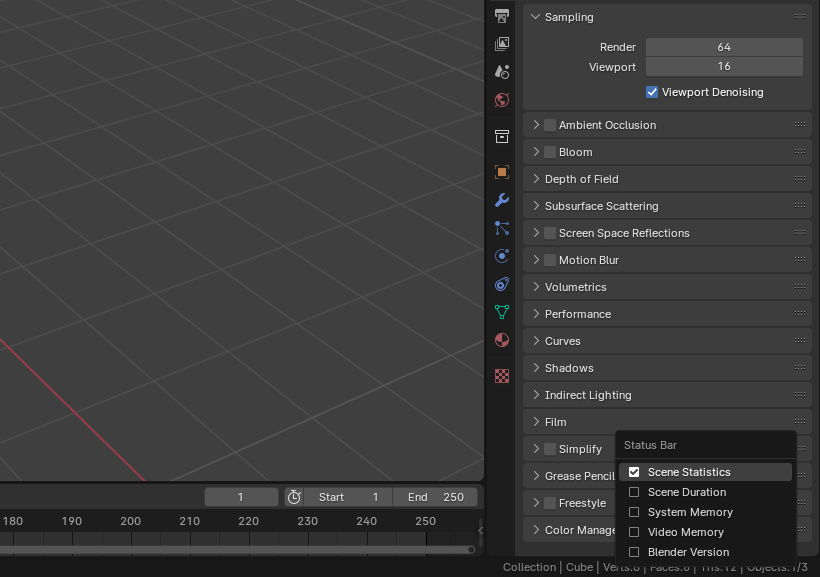
To check the amount of triangles for any or all the objects in a scene in Blender: right-click the right side of the status bar (the thin strip/banner located at the very bottom of the Blender application window) and tick the Scene Statistics checkbox.
First, identify the object(s) with the largest geometry count, and then you can work on finding a way to lower their geometry. Note that objects from 3D scans (by means of photogrammetry or other similar methods) are usually more geometry-heavy.
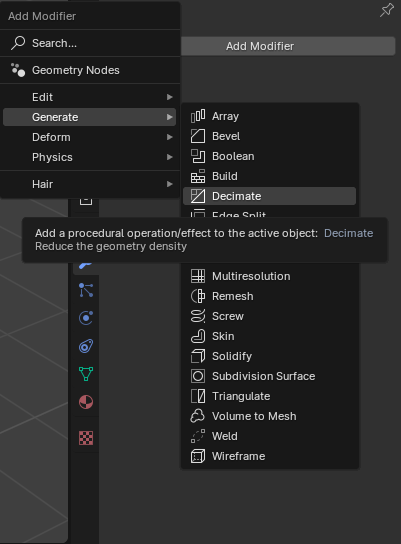
A simple way to reduce the geometry of 3D objects is to apply a Decimate modifier on them, found in the modifiers tab, under Generate>Decimate.
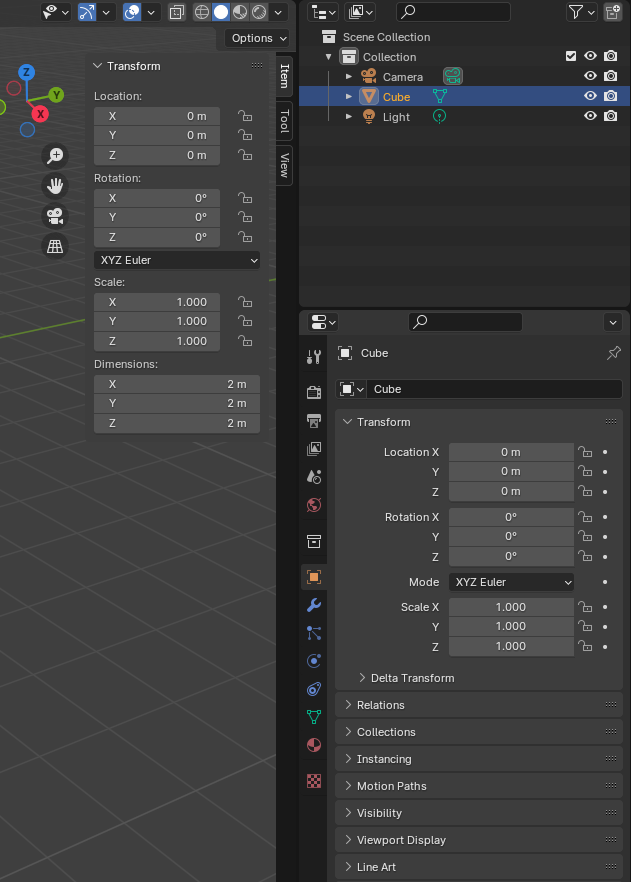
The (relative) location, rotation, or scale of one or more of my 3D model(s) is different than expected. How can I resolve this issue?
If one or more objects appear differently on your 3D application of choice than on Voyager, this may be due to unapplied object transforms. This can be resolved by applying all the Transform values to the 3D objects before exporting them. This can be easily done by accessing the Object menu while in Object Mode, and then selecting Apply>All Transforms (or the transform that is problematic).

Please note that, right before exporting, it is crucial for all the object transforms to be in their default values (0,0,0 for location, 0 degrees on all axes for rotation, and 1.0,1.0,1.0 for scale).